 Answerfinch
Recipes
Three ways to email the right person, and only them
Each recipe is a few Google Forms™ questions and Answerfinch rules. Answerfinch sends the email automatically, but only when an answer matches.
On the free plan you can run one rule at a time across your Google account, with every condition type. Running several routes at once needs Pro.
Recipe 1
Refund requests go to billing
Your billing inbox gets refund requests, and nothing else.
You'll need
- Request typemultiple choice, required: Refund, Sales, Support
- Order numbershort answer, required
- Nameshort answer
- Messageparagraph
The rule
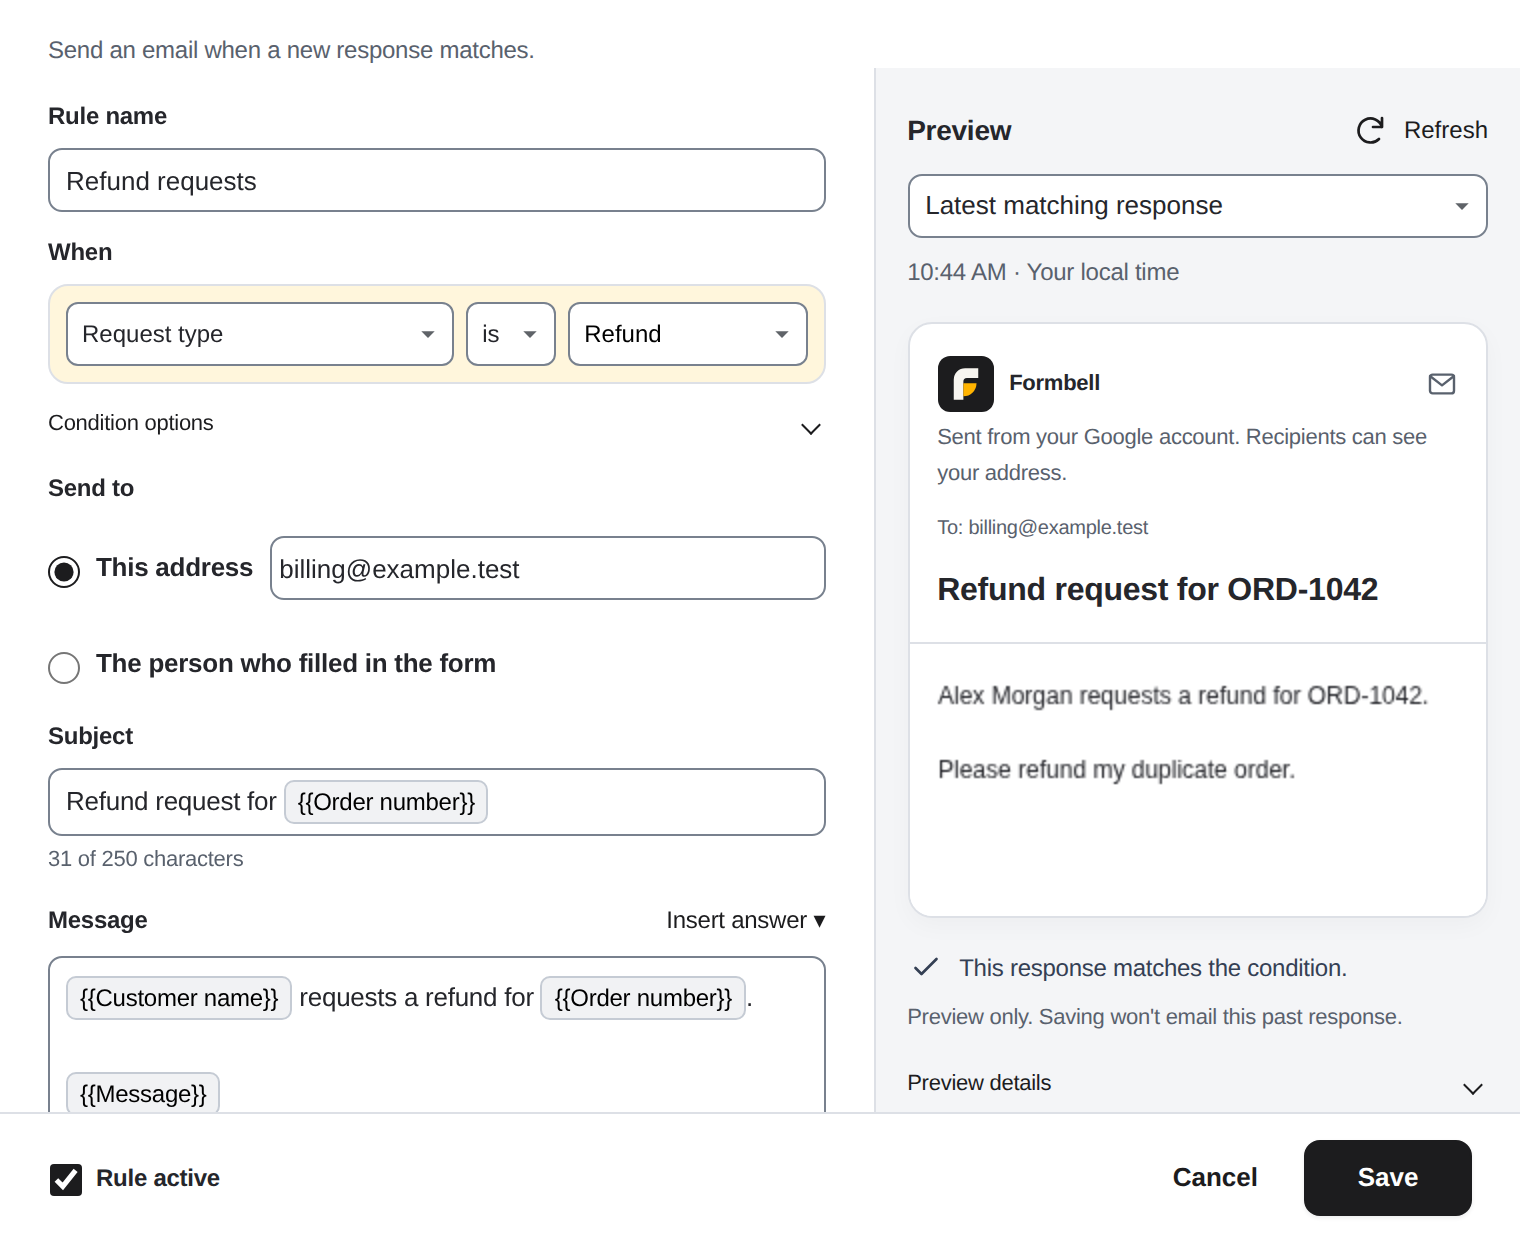
When Request type is Refund, email your billing address.
Put the order number in the subject. Add the name, order number and message to the body with Insert answer. You don't need to collect respondent emails, because the email goes to your own inbox.
Answerfinch only sends the email. You still approve and process the refund yourself.
Recipe 2
Confirm event registrations
When someone says yes, they get an email that names the session they picked.
You'll need
- Attendancemultiple choice, required: Yes, No
- Nameshort answer, required
- Sessionmultiple choice or dropdown, required
- Emailshort answer with email validation, only if you don't use collected email
The rule
When Attendance is Yes, email the person who filled in the form.
If your form collects email addresses, choose Email collected by Google Forms. If collection is off or Answerfinch can't check it, choose your Email question instead.
Say you received their registration. Don't promise a seat or a payment the form can't check.
Recipe 3
Send each inquiry to the right person
Sales questions go to sales, and support questions go to support.
You'll need
- Request typemultiple choice, required: Sales, Support, Billing
- Nameshort answer
- Messageparagraph, required
The rules
- When Request type is Sales, email your sales address.
- When Request type is Support, email your support address.
- When Request type is Billing, email your billing address.
On Free you can run one route at a time. All three together needs Pro, $4 a month or $29 a year, taxes included. Keep Request type a single-choice question. If you use checkboxes with contains or is any of, one response can match several rules, and Answerfinch sends one email per matching rule.
Try it before real responses arrive
- Submit a response that matches the rule. Use your own address wherever an email is needed.
- Open the rule, preview the email with that response, and save.
- On Free, if another rule is already running, choose which one runs.
- If you see Preview and test on the rule, open it and confirm with Turn on alerts and send test. Otherwise turn alerts on, then click Send me a test. The test goes only to you.
- When real responses come in, check the send log. Sent means Google accepted the email for sending. It doesn't tell you whether the email reached the inbox.
Each rule has one condition and one recipient address, with no CC or BCC. Google's daily sending limits apply. These recipes don't come with ready-made Answerfinch rules, so you create the rule in your own form.
Step by step: route notifications by answer · send a personalized confirmation